How to Create your Quilted Coat

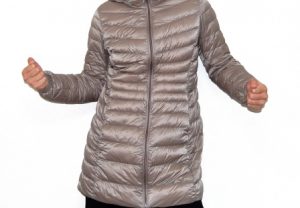
A quilted jacket is a fashionable, stylish and functional garment that can be worn with different outfits. It gives the feeling of elegance with simplicity. If you use a high-quality material, the jacket can be durable. To make matters even more intriguing, the jacket does not have to be expensive as you can make your quilted jacket that is fitting and in your preferred fabric pattern.
A trim down jacket with lying seams makes the jacket exceptionally well fit. This brief overview looks into a few tips and tricks you can use to create the quilted coat of your dreams. Of course, this would be possible if you utilize one of the good quilting sewing machines.
Creating a Quilted Coat
-
Pick the pattern you prefer
Pick an appealing design that is also heavy. Thick fabrics make the material bulk giving it a great fit. A light jacket will not fit properly.
-
Test the fit
You can check the fit by holding a tissue up to your body or simply pinning the 9 yards garment on your body. It is also paramount to first use a test piece with a thick cheap fabric. Ensuring the jacket is fitting is imperative as you do not want to waste 10 hours on a garment that does not fit.

-
Mark your design on the fabric
This is another important step. Before cutting the fabric make lines indicating the patterns using water soluble mark pen. Mark all registration lines as well as dots.
-
Cut the fabric
Proceed to cut now your fabric ensuring your cut is 2 inches from the marks. The extra space is necessary in case you will need to shift during quilting.
-
Choose a design
Use a quilting pencil to mark the design on the jacket. You can make a copy of your pattern on a piece of graph paper and experiment different designs using a light box. Proceed to mark the garment to indicate front, sleeves, and back. It is important to leave at least 5/8’’ open around the edge for the seam.
-
Proceed to cut out backing as well as battling
Choose an inside fabric that is close to your outside fabric. Baste the garment starting from the center out to ensure it is smooth. Then quilt your garment along the already marked design lines.
 Cut your pattern along the lines and then proceed to piece it following its pattern directions. Seam only the outside fabric and the flannel without stitching the backing fabric.
- Seam to trim away the fannel or battling ensuring you do not cut through it. Unpin the backing fabric then smooth the inside fabric then proceed to take the other side and fold it under ¼ inch. Pin the fabric over the seam and continue to stitch it down. Your arm fabric should be folded on top then stitched down for a nice finish.


